This tutorial introduces the Node-RED programming environment. We will be building an app that grabs earthquake data from the US Geological Survey, then sends an email if a sufficiently severe earthquake happened. This is an extension of the first and second flows in the Node-RED documentation. In particular we will:
- Install Node-RED
- Describe the web-based IDE
- Look at the messages a simple flow generates
- Get earthquake data from the USGS
- Convert that data from CSV to JSON
- Check that JSON for major quakes
- Determine if we should send email
- Send email if a major quake occurred
- Look at the source code of the final app
- Export flows from the web-based IDE
- Import flows into the web-based IDE
Introduction
Node-RED was developed by Nick O’Leary and Dave Conway-Jones, researchers at IBM's Emerging Technologies group. It was designed for rapid prototypes of applications that connect devices and sensors to web services - which makes it perfect for IoT! It was released as open-source in 2014, and has since developed a community of contributors.
Node-RED is a visual data-flow programming language. This means that steps in a particular program are represented as components or "nodes"; the nodes receives data, processes it, then optionally sends the data as a message onward through connections or "wires". Note that this is different from visual control-flow languages, which are "live" flowcharts.
Developers use a web-based IDE to “write” programs in Node-RED, though it is more like "drawing" than "writing". These programs are called "flows". When deployed, these flows are translated into Node.js and then executed.
Installation
Raspberry Pi already has Node-RED installed as part of Raspian. For everybody else, use the following steps to install Node-RED:
- Make sure that Node.js and NPM are already installed. If not, the installer for both Node.js and NPM can be found on the Node.js website.
- Open a Terminal window and enter the following command:
sudo npm install -g node-red - Once successfully installed, enter this command to start Node-RED:
node-red - To get to the web-based IDE, open a browser window and go to this URL:
http://127.0.0.1:1880
The Web-Based IDE
The IDE looks like this:

The parts of the IDE are:
- Workspace - where you draw your flow
- Workspace Tabs
- New Workspace Tab Button
- Node Palette - list of available nodes
- Search Installed Nodes
- Deploy Button - click this to run the flow(s)
- Menu
- Info Sidebar Tab - contains node information, tips, etc.
- Debug Sidebar Tab - used for output
- Zoom Controls - control magnification of the workspace
- Tips and Hints
There are also configuration panes, additional sidebar tabs, etc., that are displayed as needed.
Something to notice about the Node Palette is that the nodes in it are grouped into sections like input, output, functions, and so on. Under the storage section there are only three nodes, and they are all for file-based storage. We'll see in a later post how to add other nodes to the palette, including additional means of storage.
Messages in Flows
The final version of our flow is an extension of two of the flows in the Node-RED documentation. Our version will:
- Grab earthquake data from the USGS
- Format that data as a number of JSON objects
- If there is an earthquake with magnitude 6.5 or greater...
- ... it will send an email
To start, drag the one Inject node and one Debug node from the palette onto the workspace. Put the Inject node on the left side and the Debug node on the right side of the workspace. The text inside each node will change when they are dropped on the workspace: the Inject node's label will read "timestamp" and the Debug node's label will be "msg.payload". That's OK.
The Inject node sends a message into a flow. By default, you'll have to click the blue button projecting from the left side of the node. Inject nodes can also periodically send messages - no button click required.
The Debug node displays the incoming message (or part of a message) in the Debug sidebar tab. Output can be disabled by clicking the green button on the right side of the node.
Next, draw a wire connecting them. This is done by clicking and dragging the little grey circle on the right side of the Inject node and finishing on top of the little gray circle on the left side of the Debug node. Those little grey circles are called "ports". Here's what the flow should look like:

Click the "Deploy" button to run this flow. Click the Debug sidebar tab, then click the blue button on the Inject tab a few times. The current epoch time should be displayed in the Debug tab:

So the Inject node sends the epoch time to the Debug node, which displays it in the Debug tab. However, the primary purpose of the Inject node is not to send epoch time into a flow; rather, its purpose is to kick-off a flow.
Notice that the Debug node reads "msg.payload". This is a sign that the entire msg object (the message being sent from Inject to Debug) is NOT being displayed. To change this, double click the Debug node. A property sheet will be displayed. Change the "Output" field so that it reads "complete msg object", like this:

Click the "Done" button, click the "Deploy" button, and try the Inject button again. Now the complete msg is displayed in the Debug tab. If we copy that message and pretty print it, we see that it is nothing but a JSON object:
{
  "_msgid": "4fb55bb0.6a3014",
  "topic": "",
  "payload":1511641857466
}
In this case, msg.payload is an integer. It is possible for the payload to be an array, an object, or any other JavaScript type. It is also possible to add fields to the msg object, and to remove them, too.
Get Earthquake Data
Now let's grab us some earthquake data! This is done using the HTTP Request node found in the the "function" section of the node palette. Drag one of those onto the workspace. Delete the wire running from the Inject node to the Debug node by clicking it and pressing "Delete". Wire up the three nodes as follows:
The USGS provides a number of data feeds, one being the significant earthquakes that occurred this week, which can be found at:
https://earthquake.usgs.gov/earthquakes/feed/v1.0/summary/significant_week.csv
The data is returned in CSV format, with the first line being the field names. A description of this data, along with links to other data feeds, can be found at the USGS website.
Double click the HTTP Node and set the URL to be that URL. Press the "Done" button, then deploy, and try the blue button on the Inject node. The USGS' CSV will be displayed in the Debug sidebar tab - it will be stored in msg.payload. Also notice that there are some additional properties: a statusCode of 200, a headers object, and a responseUrl. These are all examples of how a node can modify the incoming msg object.
Format CSV Data as JSON
For easier processing, we will reformat msg.payload as JSON. This is done with the CSV node under "functions". Drag one of those onto the workspace and update the wiring as shown:

Double click the CSV node and make the following two changes:
- For input, click the checkbox next to "first row contains column names"
- Set output so that it returns "a single message [array]"
Deploy the flow and note that msg.payload is now an array of JSON objects. Here's the msg, minus a bunch of fields we won't be using:
{
  "_msgid": "4f61fb4c.d79b04",
  "topic": "",
  "payload":
    [
      {
        "time": "2017-11-19T22:43:29.230Z",
        "latitude": -21.3337,
        "longitude": 168.683,
        "depth": 10,
        "mag": 7,
        "magType": "mww",
        // Additional fields
      },
      {
        "time": "2017-11-19T15:09:03.120Z",
        "latitude": -21.5167,
        "longitude": 168.5426,
        "depth": 14.19,
        "mag": 6.6,
        "magType": "mww",
        // Additional fields
      },
      {
        "time": "2017-11-19T09:25:50.360Z",
        "latitude": -21.5756,
        "longitude": 168.6056,
        "depth": 25.29,
        "mag": 6.4,
        "magType": "mww",
        // Additional fields
      }
    ],
  "statusCode": 200,
  "headers":
    {
      // Bunch of headers
    },
  "responseUrl": "https://earthquake.usgs.gov/earthquakes/feed/v1.0/summary/significant_week.csv"
}
Check for Major Quakes
Let's process that data to see if there were any major earthquakes, where "major" means at or above magnitude 6.5. The easiest way of doing this is to use a Function node, found in the "function" section of the palette. This node basically runs a block of JavaScript code, using the msg object as input. Drop one of them onto the workspace, then double click it. Set the name to be "Check for Big Quakes" and set the code in the "Function" textarea to be:
1 2 3 4 5 6 7 8 9 10 11 12 13 14 15 | const thresholdMagnitude = 6.5; var majorQuakeOccurred = false; var numQuakes = msg.payload.length; for(var i = 0; i < numQuakes; i++) { var currentQuake = msg.payload[i]; if(currentQuake.mag >= thresholdMagnitude) { majorQuakeOccurred = true; } } msg.majorQuakeOccurred = majorQuakeOccurred; return msg; |
This code is pretty straightforward: lines 5 - 12 scans the msg.payload array for quakes with magnitude 6.5 or above (magnitude is stored in the mag property). If it finds one, it sets a variable called majorQuakeOccurred to be true. In line 14 we add a new property to msg, majorQuakeOccurred. This demonstrates how we can alter the message object.
Rewire the flow as follows:

Deploy the flow and click the Inject node's button. In the debug sidebar, you'll see that msg indeed now has a majorQuakeOccurred property.
Should Email be Sent? We want to send an email only if there has been a major earthquake. We will use a Switch node to test whether msg.majorQuakeOccurred is true. Drag a Switch node onto the workspace, then double click the Switch node. Set the Property to be msg.majorQuakeOccurred. Set the dropdown to be "is true". Add another test by clicking the tiny "+ add" button and set the dropdown to be false. Change Name to be "Send Email?". The final result will look like this:

The Switch node now has two output ports: one for when a major quake happened, and the other for when there were no major quakes in the data.
Send Email
Now add an EMail node. The EMail node we want is in the "social" section of the palette, and it has a port on the left side. Drop one on the workspace, double click it, and set the properties as follows:
To: your_email@whatever.comGive the node a friendly display name like "Send!", then press "Done". Wire-up the nodes as follows:
Server: your mail server
Userid and Password should be what you use for that mail server.

Deploy the flow and click the Inject button. If the mail server credentials are correct (and there was a quake with magnitude ≥ 6.5), you should get an email!
There are two little problems with that email, however: the subject is set at "Message from Node-RED", and the body is msg.payload JSON, and it isn't even pretty printed!
We fix these problems by using another Function node. Drop another one on the workspace, double click it and enter the following JavaScript:
1 2 3 | msg.payload = "OH NOES, a major quake occurred!"; msg.topic = "Quake Alert!"; return msg; |
For whatever reason, the built-in Email node uses msg.topic as the email subject. Give the node a friendly name like "Prepare Email" and press "Done". Wire up the new Function node as follows:

Try it out!
Final Version
So there it is. Additions to this project include setting this flow to run periodically, and (of course) preventing so many emails that it looks like we're getting spam! The final thing we will do with this flow is to give all the nodes friendly names:

Here's the source code:
1 2 3 4 5 6 7 8 9 10 11 12 13 14 15 16 17 18 19 20 21 22 23 24 25 26 27 28 29 30 31 32 33 34 35 36 37 38 39 40 41 42 43 44 45 46 47 48 49 50 51 52 53 54 55 56 57 58 59 60 61 62 63 64 65 66 67 68 69 70 71 72 73 74 75 76 77 78 79 80 81 82 83 84 85 86 87 88 89 90 91 92 93 94 95 96 97 98 99 100 101 102 103 104 105 106 107 108 109 110 111 112 113 114 115 116 117 118 119 120 121 122 123 124 125 126 127 128 129 130 131 132 133 134 135 136 137 138 139 140 141 142 | [
{
"id": "5a5f169d.5da2d8",
"type": "inject",
"z": "dc3bf0a3.1e97e",
"name": "Click to Run",
"topic": "",
"payload": "",
"payloadType": "date",
"repeat": "",
"crontab": "",
"once": false,
"x": 113,
"y": 158,
"wires": [
[
"c9db3111.e7287"
]
]
},
{
"id": "c9db3111.e7287",
"type": "http request",
"z": "dc3bf0a3.1e97e",
"name": "Get Earthquake Data",
"method": "GET",
"ret": "txt",
"url": "https://earthquake.usgs.gov/earthquakes/feed/v1.0/summary/significant_week.csv",
"tls": "",
"x": 327,
"y": 158,
"wires": [
[
"38805f6.6f7faa"
]
]
},
{
"id": "38805f6.6f7faa",
"type": "csv",
"z": "dc3bf0a3.1e97e",
"name": "Reformat Data",
"sep": ",",
"hdrin": true,
"hdrout": "",
"multi": "mult",
"ret": "\\n",
"temp": "",
"x": 550,
"y": 158,
"wires": [
[
"5384218b.7336d"
]
]
},
{
"id": "5384218b.7336d",
"type": "function",
"z": "dc3bf0a3.1e97e",
"name": "Check for Big Quakes",
"func": "const thresholdMagnitude = 6.5;\nvar majorQuakeOccurred = false;\nvar numQuakes = msg.payload.length;\n\nfor(var i = 0; i < numQuakes; i++)\n{\n var currentQuake = msg.payload[i];\n if(currentQuake.mag >= thresholdMagnitude)\n {\n majorQuakeOccurred = true;\n }\n}\n\nmsg.majorQuakeOccurred = majorQuakeOccurred;\nreturn msg;",
"outputs": 1,
"noerr": 0,
"x": 337,
"y": 273,
"wires": [
[
"df92475d.926528"
]
]
},
{
"id": "14299f03.d198e1",
"type": "debug",
"z": "dc3bf0a3.1e97e",
"name": "Show Debug Data",
"active": true,
"console": "false",
"complete": "true",
"x": 576,
"y": 445,
"wires": []
},
{
"id": "df92475d.926528",
"type": "switch",
"z": "dc3bf0a3.1e97e",
"name": "Send Email?",
"property": "majorQuakeOccurred",
"propertyType": "msg",
"rules": [
{
"t": "true"
},
{
"t": "false"
}
],
"checkall": "true",
"outputs": 2,
"x": 326,
"y": 391,
"wires": [
[
"4eec3f1.cb900c"
],
[
"14299f03.d198e1"
]
]
},
{
"id": "580f1075.de7a4",
"type": "e-mail",
"z": "dc3bf0a3.1e97e",
"server": "smtp.gmail.com",
"port": "465",
"secure": true,
"name": "madgeometer@gmail.com",
"dname": "Send!",
"x": 742,
"y": 333,
"wires": []
},
{
"id": "4eec3f1.cb900c",
"type": "function",
"z": "dc3bf0a3.1e97e",
"name": "Prepare Email",
"func": "msg.payload = \"OH NOES, a major quake occurred!\";\nmsg.topic = \"Quake Alert!\";\nreturn msg;",
"outputs": 1,
"noerr": 0,
"x": 564,
"y": 333,
"wires": [
[
"580f1075.de7a4"
]
]
}
]
|
Exporting Flows
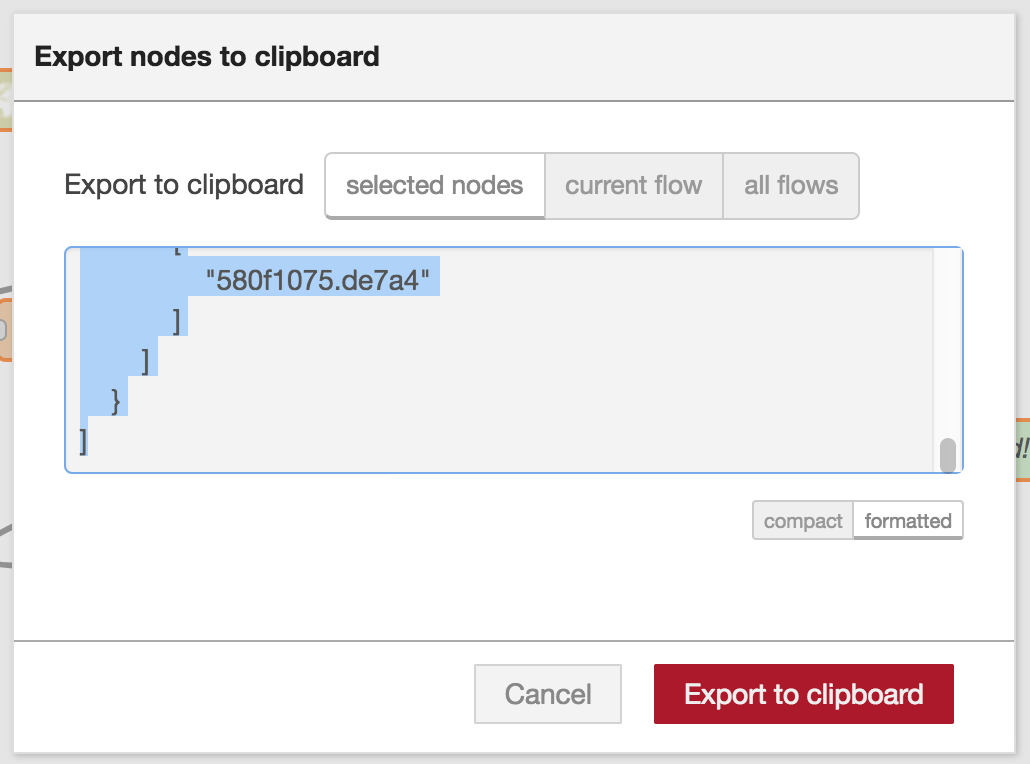
Node-RED stores flows as JSON objects, like the above source code shows. These are saved whenever we quit the Node-RED service, but it is better to store our flows externally. To export a flow, select all the nodes and wires in the tab (draw a rectangle around them), click the menu button, then choose Export | Clipboard. You can also choose "select flow" in the dialog that appears. Then choose "formatted", and press the "Export to clipboard" button. This JSON can then be saved in a file, uploaded to Git, discussed in message boards, etc.
Importing Flows
So how do we get flow JSON into the Node-RED IDE? To import a flow, click the menu button, then choose Import | Clipboard. You can then paste flow JSON in the dialog that opens.

No comments:
Post a Comment