Showing posts with label js. Show all posts

Saturday, November 25, 2017

Node-RED: Subscribing to a MQTT Topic

For our next Node-RED flow, we will build a MQTT client that will subscribe to BME280 sensor data published by an ESP8266. The hardeare and code for publishing that data is described in an earlier post.

The messages published to the MQTT topic home/living-room are CSV strings containing temperature, humidity, and barometric pressure in British units. Here's an example of such a message:

71.55,41.46,29.73

Our goal for this post is to build a Node-RED flow that subscribes to that topic, and parses that data into JSON like this:

{
    "temperature": 71.55,
    "humidity": 41.46,
    "barometric-pressure": 29.73
}

For this flow, we'll be using the following three types of nodes:

MQTT In
Connects to a MQTT server and subscribes to a specified topic
CSV
Converts CSV data into JSON
Debug
Displays messages in the debug tab

These nodes will be connected as follows:

Double-click the MQTT In node and set the following properties:

Server: 192.168.1.11:1883
Topic: home/living-room
QoS: 0

Next, double-click the CSV node and set the following properties:

Columns: temperature,humidity,barometric-pressure
Separator: Comma
Name: Parse CSV into JSON

Finally, double-click each of the Debug nodes and set the following properties:

Output: complete msg object
to: debug tab

The CSV node uses the column names for the field names, and assigns values to those fields in the order of the values in the incoming CSV. The end result is set to be the message's payload. This is how the messages look in the debug tab:

Pretty-printing the top entry in the debug list shows that the msg object has the following structure:

{
  "topic": "home/living-room",
  "payload":
  {
    "temperature": 73.8,
    "humidity": 37.12,
    "barometric-pressure": 29.6
  },
  "qos": 0,
  "retain": false,
  "_msgid": "1c091ae3.456e45"
}

Great, we've subscribed to a MQTT topic and formatted the incoming CSV data as a JSON object!

Wouldn't it be nice if there were timestamps in these objects? As explained in the post where we built and coded the sensor, our little ESP8266 doesn't have a clock running on battery, nor are we getting time from a network time service. Instead, we will add the timestamp to the data once it arrives in our Node-RED flow.

To accomplish this, we will use a Function node, which will run a block of JS. Wire this Function node into the rest of the flow as follows:

Double-click on the Function node, and set the name to be Add Time Info. In the "Function" textarea, add the following code:

1
2
3
4
var now = new Date();
msg.payload["timestamp"] = now.getTime();
msg.payload["fomratted-time"] = now.toUTCString();
return msg;

All that this code does is to add two additional properties to msg.payload. The JavaScript .getDate() method returns the number of milliseconds since January 1, 1970, and the .toUTCString() formats that data into a human-readable form in the GMT timezone.

Clear the debug tab, deploy the edited flow, and examine the incoming data. Here's an example of what the final result will be, once we pretty-print it:

{
  "topic": "home/living-room",
  "payload": 
  {
    "temperature": 73.76,
    "humidity": 37.35,
    "barometric-pressure": 29.6,
    "timestamp": 1511588927869,
    "formatted-time": "Sat, 25 Nov 2017 05:48:47 GMT"
  },
  "qos": 0,
  "retain": false,
  "_msgid":"3867cbee.a2cfa4"
}

Here's the source code for this last flow:

 1
 2
 3
 4
 5
 6
 7
 8
 9
10
11
12
13
14
15
16
17
18
19
20
21
22
23
24
25
26
27
28
29
30
31
32
33
34
35
36
37
38
39
40
41
42
43
44
45
46
47
48
49
50
51
52
53
54
55
56
57
58
59
60
61
62
63
64
65
66
67
68
69
70
71
72
73
74
75
76
77
78
79
80
81
82
83
84
85
86
87
88
89
90
91
92
93
94
95
96
[
    {
        "id": "ee409dc6.f511b",
        "type": "mqtt in",
        "z": "e260f053.ca405",
        "name": "",
        "topic": "home/living-room",
        "qos": "0",
        "broker": "a481358c.031c18",
        "x": 120,
        "y": 160,
        "wires": [
            [
                "f90ccd18.b0f84",
                "b7c62375.17de5"
            ]
        ]
    },
    {
        "id": "f90ccd18.b0f84",
        "type": "debug",
        "z": "e260f053.ca405",
        "name": "",
        "active": false,
        "console": "false",
        "complete": "true",
        "x": 770,
        "y": 160,
        "wires": []
    },
    {
        "id": "b7c62375.17de5",
        "type": "csv",
        "z": "e260f053.ca405",
        "name": "Parse CSV into JSON",
        "sep": ",",
        "hdrin": "",
        "hdrout": "",
        "multi": "one",
        "ret": "\\n",
        "temp": "temperature,humidity,barometric-pressure",
        "x": 380,
        "y": 220,
        "wires": [
            [
                "5097ac3c.7d4b04"
            ]
        ]
    },
    {
        "id": "adf30d5c.857be",
        "type": "debug",
        "z": "e260f053.ca405",
        "name": "",
        "active": true,
        "console": "false",
        "complete": "true",
        "x": 770,
        "y": 220,
        "wires": []
    },
    {
        "id": "5097ac3c.7d4b04",
        "type": "function",
        "z": "e260f053.ca405",
        "name": "Add Time Info",
        "func": "var now = new Date();\nmsg.payload[\"timestamp\"] = now.getTime();\nmsg.payload[\"fomratted-time\"] = now.toUTCString();\nreturn msg;",
        "outputs": 1,
        "noerr": 0,
        "x": 600,
        "y": 220,
        "wires": [
            [
                "adf30d5c.857be"
            ]
        ]
    },
    {
        "id": "a481358c.031c18",
        "type": "mqtt-broker",
        "z": "",
        "broker": "192.168.1.11",
        "port": "1883",
        "clientid": "",
        "usetls": false,
        "compatmode": true,
        "keepalive": "60",
        "cleansession": true,
        "willTopic": "",
        "willQos": "0",
        "willPayload": "",
        "birthTopic": "",
        "birthQos": "0",
        "birthPayload": ""
    }
]

What are we going to do with all this data flowing in? That's the topic of the next post!

Node-RED: Introduction, Basic Flows, and Messages

This tutorial introduces the Node-RED programming environment. We will be building an app that grabs earthquake data from the US Geological Survey, then sends an email if a sufficiently severe earthquake happened. This is an extension of the first and second flows in the Node-RED documentation. In particular we will:

  1. Install Node-RED
  2. Describe the web-based IDE
  3. Look at the messages a simple flow generates
  4. Get earthquake data from the USGS
  5. Convert that data from CSV to JSON
  6. Check that JSON for major quakes
  7. Determine if we should send email
  8. Send email if a major quake occurred
  9. Look at the source code of the final app
  10. Export flows from the web-based IDE
  11. Import flows into the web-based IDE


Introduction
Node-RED was developed by Nick O’Leary and Dave Conway-Jones, researchers at IBM's Emerging Technologies group. It was designed for rapid prototypes of applications that connect devices and sensors to web services - which makes it perfect for IoT! It was released as open-source in 2014, and has since developed a community of contributors.

Node-RED is a visual data-flow programming language. This means that steps in a particular program are represented as components or "nodes"; the nodes receives data, processes it, then optionally sends the data as a message onward through connections or "wires". Note that this is different from visual control-flow languages, which are "live" flowcharts.

Developers use a web-based IDE to “write” programs in Node-RED, though it is more like "drawing" than "writing". These programs are called "flows". When deployed, these flows are translated into Node.js and then executed.


Installation
Raspberry Pi already has Node-RED installed as part of Raspian. For everybody else, use the following steps to install Node-RED:

  1. Make sure that Node.js and NPM are already installed. If not, the installer for both Node.js and NPM can be found on the Node.js website.
  2. Open a Terminal window and enter the following command:
    sudo npm install -g node-red
  3. Once successfully installed, enter this command to start Node-RED:
    node-red
  4. To get to the web-based IDE, open a browser window and go to this URL:
    http://127.0.0.1:1880


The Web-Based IDE
The IDE looks like this:

The parts of the IDE are:

  1. Workspace - where you draw your flow
  2. Workspace Tabs
  3. New Workspace Tab Button
  4. Node Palette - list of available nodes
  5. Search Installed Nodes
  6. Deploy Button - click this to run the flow(s)
  7. Menu
  8. Info Sidebar Tab - contains node information, tips, etc.
  9. Debug Sidebar Tab - used for output
  10. Zoom Controls - control magnification of the workspace
  11. Tips and Hints

There are also configuration panes, additional sidebar tabs, etc., that are displayed as needed.

Something to notice about the Node Palette is that the nodes in it are grouped into sections like input, output, functions, and so on. Under the storage section there are only three nodes, and they are all for file-based storage. We'll see in a later post how to add other nodes to the palette, including additional means of storage.


Messages in Flows
The final version of our flow is an extension of two of the flows in the Node-RED documentation. Our version will:

  1. Grab earthquake data from the USGS
  2. Format that data as a number of JSON objects
  3. If there is an earthquake with magnitude 6.5 or greater...
  4. ... it will send an email
This functionality won't come all at once - we'll build it iteratively.

To start, drag the one Inject node and one Debug node from the palette onto the workspace. Put the Inject node on the left side and the Debug node on the right side of the workspace. The text inside each node will change when they are dropped on the workspace: the Inject node's label will read "timestamp" and the Debug node's label will be "msg.payload". That's OK.

The Inject node sends a message into a flow. By default, you'll have to click the blue button projecting from the left side of the node. Inject nodes can also periodically send messages - no button click required.

The Debug node displays the incoming message (or part of a message) in the Debug sidebar tab. Output can be disabled by clicking the green button on the right side of the node.

Next, draw a wire connecting them. This is done by clicking and dragging the little grey circle on the right side of the Inject node and finishing on top of the little gray circle on the left side of the Debug node. Those little grey circles are called "ports". Here's what the flow should look like:

Click the "Deploy" button to run this flow. Click the Debug sidebar tab, then click the blue button on the Inject tab a few times. The current epoch time should be displayed in the Debug tab:

So the Inject node sends the epoch time to the Debug node, which displays it in the Debug tab. However, the primary purpose of the Inject node is not to send epoch time into a flow; rather, its purpose is to kick-off a flow.

Notice that the Debug node reads "msg.payload". This is a sign that the entire msg object (the message being sent from Inject to Debug) is NOT being displayed. To change this, double click the Debug node. A property sheet will be displayed. Change the "Output" field so that it reads "complete msg object", like this:

Click the "Done" button, click the "Deploy" button, and try the Inject button again. Now the complete msg is displayed in the Debug tab. If we copy that message and pretty print it, we see that it is nothing but a JSON object:

{
  "_msgid": "4fb55bb0.6a3014",
  "topic": "",
  "payload":1511641857466
}

In this case, msg.payload is an integer. It is possible for the payload to be an array, an object, or any other JavaScript type. It is also possible to add fields to the msg object, and to remove them, too.


Get Earthquake Data
Now let's grab us some earthquake data! This is done using the HTTP Request node found in the the "function" section of the node palette. Drag one of those onto the workspace. Delete the wire running from the Inject node to the Debug node by clicking it and pressing "Delete". Wire up the three nodes as follows:

The USGS provides a number of data feeds, one being the significant earthquakes that occurred this week, which can be found at:

https://earthquake.usgs.gov/earthquakes/feed/v1.0/summary/significant_week.csv

The data is returned in CSV format, with the first line being the field names. A description of this data, along with links to other data feeds, can be found at the USGS website.

Double click the HTTP Node and set the URL to be that URL. Press the "Done" button, then deploy, and try the blue button on the Inject node. The USGS' CSV will be displayed in the Debug sidebar tab - it will be stored in msg.payload. Also notice that there are some additional properties: a statusCode of 200, a headers object, and a responseUrl. These are all examples of how a node can modify the incoming msg object.


Format CSV Data as JSON
For easier processing, we will reformat msg.payload as JSON. This is done with the CSV node under "functions". Drag one of those onto the workspace and update the wiring as shown:

Double click the CSV node and make the following two changes:

  • For input, click the checkbox next to "first row contains column names"
  • Set output so that it returns "a single message [array]"
The first change makes the column names in the CSV into the field names in the JSON objects, one JSON object per CSV row. The second change stores all the JSON objects into an array, as opposed to emitting separate messages, one per CSV row.

Deploy the flow and note that msg.payload is now an array of JSON objects. Here's the msg, minus a bunch of fields we won't be using:

{
  "_msgid": "4f61fb4c.d79b04",
  "topic": "",
  "payload":
    [
      {
        "time": "2017-11-19T22:43:29.230Z",
        "latitude": -21.3337,
        "longitude": 168.683,
        "depth": 10,
        "mag": 7,
        "magType": "mww",
        // Additional fields
      },
      {
        "time": "2017-11-19T15:09:03.120Z",
        "latitude": -21.5167,
        "longitude": 168.5426,
        "depth": 14.19,
        "mag": 6.6,
        "magType": "mww",
        // Additional fields
      },
      {
        "time": "2017-11-19T09:25:50.360Z",
        "latitude": -21.5756,
        "longitude": 168.6056,
        "depth": 25.29,
        "mag": 6.4,
        "magType": "mww",
        // Additional fields
      }
    ],
  "statusCode": 200,
  "headers":
    {
      // Bunch of headers
    },
  "responseUrl": "https://earthquake.usgs.gov/earthquakes/feed/v1.0/summary/significant_week.csv"
}


Check for Major Quakes
Let's process that data to see if there were any major earthquakes, where "major" means at or above magnitude 6.5. The easiest way of doing this is to use a Function node, found in the "function" section of the palette. This node basically runs a block of JavaScript code, using the msg object as input. Drop one of them onto the workspace, then double click it. Set the name to be "Check for Big Quakes" and set the code in the "Function" textarea to be:

 1
 2
 3
 4
 5
 6
 7
 8
 9
10
11
12
13
14
15
const thresholdMagnitude = 6.5;
var majorQuakeOccurred = false;
var numQuakes = msg.payload.length;

for(var i = 0; i < numQuakes; i++)
{
    var currentQuake = msg.payload[i];
    if(currentQuake.mag >= thresholdMagnitude)
    {
        majorQuakeOccurred = true;
    }
}

msg.majorQuakeOccurred = majorQuakeOccurred;
return msg;

This code is pretty straightforward: lines 5 - 12 scans the msg.payload array for quakes with magnitude 6.5 or above (magnitude is stored in the mag property). If it finds one, it sets a variable called majorQuakeOccurred to be true. In line 14 we add a new property to msg, majorQuakeOccurred. This demonstrates how we can alter the message object.

Rewire the flow as follows:

Deploy the flow and click the Inject node's button. In the debug sidebar, you'll see that msg indeed now has a majorQuakeOccurred property.


Should Email be Sent?
We want to send an email only if there has been a major earthquake. We will use a Switch node to test whether msg.majorQuakeOccurred is true. Drag a Switch node onto the workspace, then double click the Switch node. Set the Property to be msg.majorQuakeOccurred. Set the dropdown to be "is true". Add another test by clicking the tiny "+ add" button and set the dropdown to be false. Change Name to be "Send Email?". The final result will look like this:

The Switch node now has two output ports: one for when a major quake happened, and the other for when there were no major quakes in the data.


Send Email
Now add an EMail node. The EMail node we want is in the "social" section of the palette, and it has a port on the left side. Drop one on the workspace, double click it, and set the properties as follows:

To: your_email@whatever.com
Server: your mail server
Userid and Password should be what you use for that mail server.
Give the node a friendly display name like "Send!", then press "Done". Wire-up the nodes as follows:

Deploy the flow and click the Inject button. If the mail server credentials are correct (and there was a quake with magnitude ≥ 6.5), you should get an email!

There are two little problems with that email, however: the subject is set at "Message from Node-RED", and the body is msg.payload JSON, and it isn't even pretty printed!

We fix these problems by using another Function node. Drop another one on the workspace, double click it and enter the following JavaScript:

1
2
3
msg.payload = "OH NOES, a major quake occurred!";
msg.topic = "Quake Alert!";
return msg;

For whatever reason, the built-in Email node uses msg.topic as the email subject. Give the node a friendly name like "Prepare Email" and press "Done". Wire up the new Function node as follows:

Try it out!


Final Version
So there it is. Additions to this project include setting this flow to run periodically, and (of course) preventing so many emails that it looks like we're getting spam! The final thing we will do with this flow is to give all the nodes friendly names:

Here's the source code:

  1
  2
  3
  4
  5
  6
  7
  8
  9
 10
 11
 12
 13
 14
 15
 16
 17
 18
 19
 20
 21
 22
 23
 24
 25
 26
 27
 28
 29
 30
 31
 32
 33
 34
 35
 36
 37
 38
 39
 40
 41
 42
 43
 44
 45
 46
 47
 48
 49
 50
 51
 52
 53
 54
 55
 56
 57
 58
 59
 60
 61
 62
 63
 64
 65
 66
 67
 68
 69
 70
 71
 72
 73
 74
 75
 76
 77
 78
 79
 80
 81
 82
 83
 84
 85
 86
 87
 88
 89
 90
 91
 92
 93
 94
 95
 96
 97
 98
 99
100
101
102
103
104
105
106
107
108
109
110
111
112
113
114
115
116
117
118
119
120
121
122
123
124
125
126
127
128
129
130
131
132
133
134
135
136
137
138
139
140
141
142
[
  {
    "id": "5a5f169d.5da2d8",
    "type": "inject",
    "z": "dc3bf0a3.1e97e",
    "name": "Click to Run",
    "topic": "",
    "payload": "",
    "payloadType": "date",
    "repeat": "",
    "crontab": "",
    "once": false,
    "x": 113,
    "y": 158,
    "wires": [
      [
        "c9db3111.e7287"
      ]
    ]
  },
  {
    "id": "c9db3111.e7287",
    "type": "http request",
    "z": "dc3bf0a3.1e97e",
    "name": "Get Earthquake Data",
    "method": "GET",
    "ret": "txt",
    "url": "https://earthquake.usgs.gov/earthquakes/feed/v1.0/summary/significant_week.csv",
    "tls": "",
    "x": 327,
    "y": 158,
    "wires": [
      [
        "38805f6.6f7faa"
      ]
    ]
  },
  {
    "id": "38805f6.6f7faa",
    "type": "csv",
    "z": "dc3bf0a3.1e97e",
    "name": "Reformat Data",
    "sep": ",",
    "hdrin": true,
    "hdrout": "",
    "multi": "mult",
    "ret": "\\n",
    "temp": "",
    "x": 550,
    "y": 158,
    "wires": [
      [
        "5384218b.7336d"
      ]
    ]
  },
  {
    "id": "5384218b.7336d",
    "type": "function",
    "z": "dc3bf0a3.1e97e",
    "name": "Check for Big Quakes",
    "func": "const thresholdMagnitude = 6.5;\nvar majorQuakeOccurred = false;\nvar numQuakes = msg.payload.length;\n\nfor(var i = 0; i < numQuakes; i++)\n{\n    var currentQuake = msg.payload[i];\n    if(currentQuake.mag >= thresholdMagnitude)\n    {\n        majorQuakeOccurred = true;\n    }\n}\n\nmsg.majorQuakeOccurred = majorQuakeOccurred;\nreturn msg;",
    "outputs": 1,
    "noerr": 0,
    "x": 337,
    "y": 273,
    "wires": [
      [
        "df92475d.926528"
      ]
    ]
  },
  {
    "id": "14299f03.d198e1",
    "type": "debug",
    "z": "dc3bf0a3.1e97e",
    "name": "Show Debug Data",
    "active": true,
    "console": "false",
    "complete": "true",
    "x": 576,
    "y": 445,
    "wires": []
  },
  {
    "id": "df92475d.926528",
    "type": "switch",
    "z": "dc3bf0a3.1e97e",
    "name": "Send Email?",
    "property": "majorQuakeOccurred",
    "propertyType": "msg",
    "rules": [
      {
        "t": "true"
      },
      {
        "t": "false"
      }
    ],
    "checkall": "true",
    "outputs": 2,
    "x": 326,
    "y": 391,
    "wires": [
      [
        "4eec3f1.cb900c"
      ],
      [
        "14299f03.d198e1"
      ]
    ]
  },
  {
    "id": "580f1075.de7a4",
    "type": "e-mail",
    "z": "dc3bf0a3.1e97e",
    "server": "smtp.gmail.com",
    "port": "465",
    "secure": true,
    "name": "madgeometer@gmail.com",
    "dname": "Send!",
    "x": 742,
    "y": 333,
    "wires": []
  },
  {
    "id": "4eec3f1.cb900c",
    "type": "function",
    "z": "dc3bf0a3.1e97e",
    "name": "Prepare Email",
    "func": "msg.payload = \"OH NOES, a major quake occurred!\";\nmsg.topic = \"Quake Alert!\";\nreturn msg;",
    "outputs": 1,
    "noerr": 0,
    "x": 564,
    "y": 333,
    "wires": [
      [
        "580f1075.de7a4"
      ]
    ]
  }
]

Exporting Flows
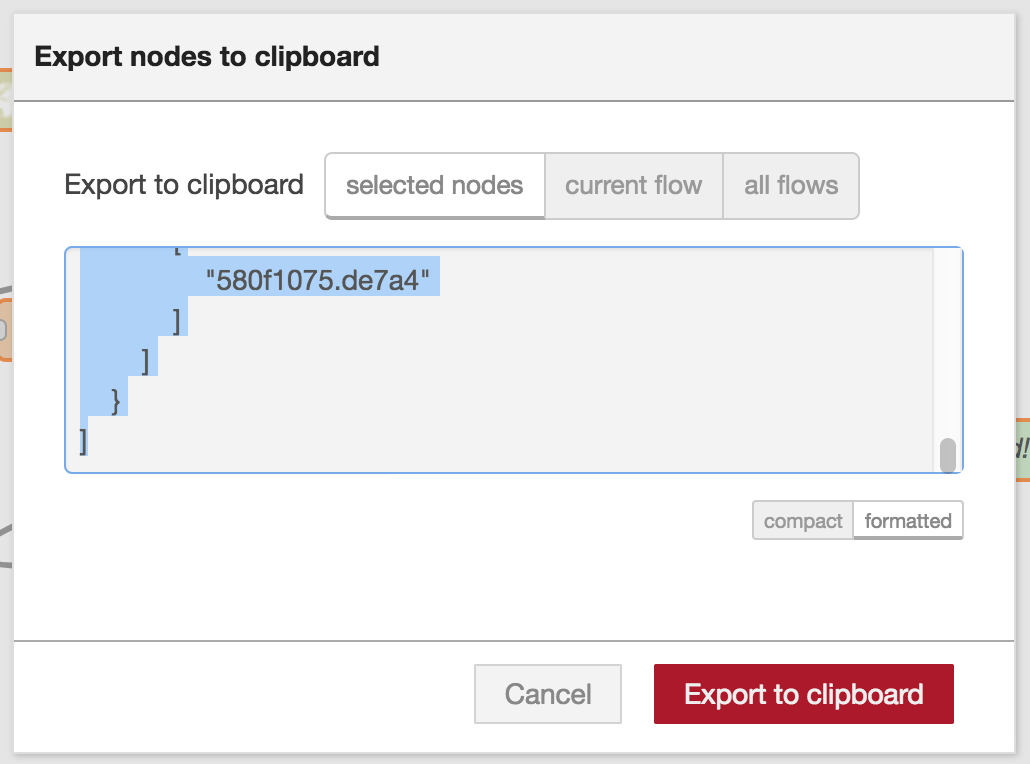
Node-RED stores flows as JSON objects, like the above source code shows. These are saved whenever we quit the Node-RED service, but it is better to store our flows externally. To export a flow, select all the nodes and wires in the tab (draw a rectangle around them), click the menu button, then choose Export | Clipboard. You can also choose "select flow" in the dialog that appears. Then choose "formatted", and press the "Export to clipboard" button. This JSON can then be saved in a file, uploaded to Git, discussed in message boards, etc.


Importing Flows
So how do we get flow JSON into the Node-RED IDE? To import a flow, click the menu button, then choose Import | Clipboard. You can then paste flow JSON in the dialog that opens.

Sunday, October 29, 2017

MQTT: Publishing and Subscribing with Node.js

This short tutorial demonstrates how to communicate with MQTT using Node.js. We will:


MQTT.js Library

A very popular MQTT library for Node.js is MQTT.js, and for good reasons:

  • it is actively supported
  • it supports most features of MQTT 3.1.1
  • it has good documentation
  • it can be used in async mode
  • and it works in a browser, too!

We'll be using this library.


Setup Test Environment

We will be using the same MTT topic from an earlier post: home/living-room/temperature

We need three Terminal windows:

  1. In the first one, we start the broker using the command:
    mosquitto
    Notice I omitted the -v verbose flag.
  2. In the second window, we start a subscriber listening to the topic
    mosquitto_sub -h localhost -t home/living-room/temperature
    Notice that I removed the -d debug flag. This way output will be cleaner.
  3. In the third Terminal window, publish a message using
    mosquitto_pub -d -h localhost -t home/living-room/temperature -m 'Hello, MQTT!'
    and the message should appear in the second window.

This is how those three windows should look:


Setup a Node.js Project

Now create a Node.js app using these steps:

  1. Open yet another Terminal window
  2. Create a folder named "MQTT with NodeJS":
    mkdir "MQTT with NodeJS"
  3. Move into that window with:
    cd "MQTT with NodeJS"
  4. Create a simple Node.js project with:
    npm init
  5. Answer some questions that will create a basic package.json
    - give the project the name "mqtt-with-node-js"
  6. Accept the default package.json file
  7. Install MQTT.js using
    npm install mqtt --save

This last command will create a subfolder called node_modules and a package.json file that looks something like this:

{
  "name": "mqtt-with-node-js",
  "version": "1.0.0",
  "description": "Demonstrates how to communicate with MQTT",
  "main": "index.js",
  "scripts": {
    "test": "echo \"Error: no test specified\" && exit 1"
  },
  "keywords": [
    "MQTT",
    "NodeJS"
  ],
  "author": "Mike Klepper",
  "license": "ISC",
  "dependencies": {
    "mqtt": "^2.12.0"
  }
}


Publishing to a MQTT Topic

Create a new file called publish.js in the same folder as package.js, and edit it to read:

 1
 2
 3
 4
 5
 6
 7
 8
 9
10
11
12
13
14
15
16
17
18
19
20
21
22
23
24
25
26
/**
 * publish.js
 *
 * By: Mike Klepper
 * Date: 29 October 2017
 *
 * This program demonstrates how to connect to MQTT
 *
 * See blog post on patriot-geek.blogspot.com
 * for instructions.
 */

const BROKER_URL = "mqtt://localhost:1883";
const TOPIC_NAME = "home/living-room/temperature";
const CLIENT_ID = "publish.js";

var MQTT = require("mqtt");
var client  = MQTT.connect(BROKER_URL, {clientId: CLIENT_ID});

client.on("connect", onConnected);

function onConnected()
{
  client.publish(TOPIC_NAME, "Hello MQTT from NodeJS!");
  client.end();
}

Here's the walkthrough:

13-15 Declare constants for the broker address, topic, and client name. Note that the address must specify the "mqtt" protocol!
17 Import the MQTT.js package
18 Create a client and connect to the broker
20 Create a listener that waits for CONACK, then calls the callback named onConnected
22 Once we're connected...
24 ...publish a message to the topic and...
25 ...close the connection.

What QoS does the MQTT.js library use when publishing? By default it is QoS 0. We can change that by modifying line 24 to read:

24
client.publish(TOPIC_NAME, "Hello MQTT from NodeJS!", {qos: 1});

We can further simplify the code by omitting the clientId from the connect statement, in which case that line will read

18
var client = MQTT.connect(BROKER_URL);

Notice that we assume that this line

24
client.publish(TOPIC_NAME, "Hello MQTT from NodeJS!");
finishes before we close the connection.
25
client.end();
Fortunately, the MQTT.js library does handle that situation by default.

While that code was extremely easy to read, it is only "happy path" code - there is no error handling! The library allows for this by providing callbacks for client.publish client.end and these callbacks can be used to catch and handle errors.


Subscribing to Single or Multiple Topics

The next program demonstrates how to subscribe to single or multiple topics. First, create a file called subscribe.js and modify it to read:

 1
 2
 3
 4
 5
 6
 7
 8
 9
10
11
12
13
14
15
16
17
18
19
20
21
22
23
24
25
26
27
28
29
30
31
32
33
/**
 * subscribe.js
 *
 * By: Mike Klepper
 * Date: 29 October 2017
 *
 * This program demonstrates how to subscribe to MQTT
 *
 * See blog post on patriot-geek.blogspot.com
 * for instructions.
 */

const BROKER_URL = "mqtt://localhost:1883";
const TOPIC_NAME = "home/living-room/temperature";
const CLIENT_ID = "subscribe.js";

var MQTT = require("mqtt");
var client  = MQTT.connect(BROKER_URL, {clientId: CLIENT_ID});

client.on("connect", onConnected);
client.on("message", onMessageReceived)

function onConnected()
{
  client.subscribe(TOPIC_NAME);
}

function onMessageReceived(topic, message)
{
  console.log(topic);
  console.log(message.toString());
  console.log("");
}

To test this program, run it with

node subscribe.js
At which point nothing appears to happen! Then go to the third Terminal window and publish a message:
mosquitto_pub -d -h localhost -t home/living-room/temperature -m 'Hello, MQTT!'
And the message should be displayed in the window running subscribe.js!

Walkthrough:

20 - 21 Set event handlers for when the client connects and it receives a message
23 When the client connects...
25 ...have it subscribe to the desired topic
28-33 When client receives a message, print the topic, the message, and a new line.

Why is the .toString() method called in line 31? It isn't necessary for printing the topic, since the topic is a string, whereas the the message is a string buffer and not a string. If we removed the toString(), the output will be

home/living-room/temperature
<Buffer 48 65 6c 6c 6f 2c 20 4d 51 54 54 21>

Now let's modify this program to subscribe to wildcard topics. Change line 14 to read:

14
const TOPIC_NAME = "home/living-room/+";

Run the program. In the Third terminal window, enter:

mosquitto_pub -d -h localhost -t home/living-room/temperature -m 'Hello, MQTT! This is the temperature!'

then enter:

mosquitto_pub -d -h localhost -t home/living-room/humidity -m 'Hello, MQTT! This is the humidity!'

In the window with the program running we should see:

home/living-room/temperature
Hello, MQTT! This is the temperature!

home/living-room/humidity
Hello, MQTT! This is the humidity!

So we have indeed subscribed to a path with a wildcard in it!

Let's experiment. Try this command:

mosquitto_pub -d -h localhost -t home/living-room/temperature/fahrenheit -m 'Hello, MQTT! This is the temperature in Fahrenheit'
This is NOT displayed in the window running the program. This is because the "+" wildcard represents only one level in a topic.

Notice that this program continues to run until we press Ctrl-C. This is a good thing, since we usually want subscribers to continuously listen for incoming messages.

Tuesday, September 5, 2017

MongoDB: Connecting with Node.js

This tutorial demonstrates how to


Introduction

There are two popular libraries for connecting to MongoDB from Node.js:
  • Native Mongo Driver
  • Mongoose

Native Mongo Driver, also called node-mongodb-native, has official support from the creators of MongoDB, and the commands it uses are similar to those used in the MongoDB shell.

Mongoose provides an ODM (Object -> Document Mapping) service. This allows the imposition of schemas on our schemaless MongoDB! It also provides field-level validations, which prevents the insertion of unexpected values in a document's fields. Mongoose is built atop Native Mongo Driver.

We will be using the first one in this tutorial. We will create several JS files that reproduce our "Queer Eye for the Straight Guy" database from a previous post.

First, start the MongoDB daemon in a Terminal window, then start the MongoDB Shell in another Terminal window. If the qeftsg database is still present, remove it using the following commands:

use qeftsg
db.cast.drop();

Now we are ready to recreate the database using Node.js!


Creating a Node.js Project

Assuming that Node.js and NPM are installed, open a new Terminal window and create a simple project:

mkdir testproject
cd testproject
npm init

After answering several questions, the following package.js file will be created:

{
  "name": "testproject",
  "version": "1.0.0",
  "description": "Demonstrates how to connect to MongoDB with Node.js",
  "main": "index.js",
  "scripts": {
    "test": "echo \"Error: no test specified\" && exit 1"
  },
  "keywords": [
    "MongoDB",
    "Node.js"
  ],
  "author": "Mike Klepper",
  "license": "ISC"
}

Now we install the Native Mongo Driver:

npm install mongodb --save

Once this command has finished running, there are two changes to the TestProject folder:

  1. There is a new folder called node_modules
  2. The project.json file has been modified: a "dependencies" section has been added:
{
  "name": "testproject",
  "version": "1.0.0",
  "description": "Demonstrates how to connect to MongoDB with Node.js",
  "main": "index.js",
  "scripts": {
    "test": "echo \"Error: no test specified\" && exit 1"
  },
  "keywords": [
    "MongoDB",
    "Node.js"
  ],
  "author": "Mike Klepper",
  "license": "ISC",
  "dependencies": {
    "mongodb": "^2.2.31"
  }
}


Connecting to MongoDB

First, create a file called connect.js in the same folder as package.json, and edit it to read:

 1
 2
 3
 4
 5
 6
 7
 8
 9
10
11
12
13
14
15
16
17
18
19
20
21
22
23
24
25
26
27
28
29
30
31
32
33
34
35
36
37
/**
 * connect.js
 *
 * By: Mike Klepper
 * Date: 3 September 2017
 *
 * This program demonstrates how to connect to MongoDB
 *
 * See blog post on patriot-geek.blogspot.com
 * for instructions.
 */

var MongoClient = require("mongodb").MongoClient;

const DATABASE_NAME = "qeftsg";
const URL = "mongodb://localhost:27017/" + DATABASE_NAME;

MongoClient.connect(URL, onConnected);

function onConnected(err, db)
{
  if(!err)
  {
    console.log("Connected to MongoDB!");
    closeConnection(err, db);
  }
  else
  {
    console.log("Problems connecting to the DB: " + err);
  }
}

function closeConnection(err, db)
{
  console.log("Closing connection");
  db.close();
}

Run the program as follows:

node connect.js
The output indicates that we successfully connected:
Connected to MongoDB!
Closing connection

Great, we've connected to the database!


Create

Now let's create the "cast" collection and populate it with the Fab Five. Create a new program called create.js:

  1
  2
  3
  4
  5
  6
  7
  8
  9
 10
 11
 12
 13
 14
 15
 16
 17
 18
 19
 20
 21
 22
 23
 24
 25
 26
 27
 28
 29
 30
 31
 32
 33
 34
 35
 36
 37
 38
 39
 40
 41
 42
 43
 44
 45
 46
 47
 48
 49
 50
 51
 52
 53
 54
 55
 56
 57
 58
 59
 60
 61
 62
 63
 64
 65
 66
 67
 68
 69
 70
 71
 72
 73
 74
 75
 76
 77
 78
 79
 80
 81
 82
 83
 84
 85
 86
 87
 88
 89
 90
 91
 92
 93
 94
 95
 96
 97
 98
 99
100
101
102
103
104
105
106
107
108
109
110
111
112
113
114
115
116
117
118
/**
 * create.js
 * 
 * By: Mike Klepper
 * Date: 3 September 2017
 * 
 * This program creates five records in MongoDB
 * 
 * See blog post on patriot-geek.blogspot.com
 * for instructions.
 */

var MongoClient = require("mongodb").MongoClient;

const DATABASE_NAME = "qeftsg";
const URL = "mongodb://localhost:27017/" + DATABASE_NAME;

var ted = {
 name: "Ted Allen",
 description: "Food and Wine Connoisseur",
 specialties: ["Alcohol", "Beverages", "Food Preparation", "Food Presentation"],
 age: 52,
 contactInfo:
 {
  website: "tedallen.net",
  email: "info@tedallen.net"
 }
};

var carson = {
 name: "Carson Kressley",
 description: "Fashion Savant",
 specialties: ["Clothing", "Fashion", "Personal Styling"],
 age: 47,
 contactInfo:
 {
  website: "carsonkressley.com",
  facebook: "carsonkressley"
 }
};

var kyan = {
 name: "Kyan Douglas",
 description: "Grooming Guru",
 specialties: ["Hair", "Grooming", "Personal Hygiene", "Makeup"],
 age: 47,
 contactInfo:
 {
  instagram: "kyandouglas",
  facebook: "kyandouglasactual"
 }
};

var thom = {
 name: "Thom Filicia",
 description: "Design Doctor",
 specialties: ["Interior Design", "Home Organization"],
 age: 48,
 contactInfo:
 {
  facebook: "thomfiliciainc",
  email: "info@thomfilicia.com",
  website: "thomfilicia.com"
 }
};

var jai = {
 name: "Jai Rodriguez",
 description: "Culture Vulture",
 specialties: ["Popular Culture", "Relationships", "Social Interaction"],
 age: 38,
 contactInfo:
 {
  website: "myspace.com/jairodriguezmusic",
  facebook: "JaiRodriguezfanpage"
 }
};

MongoClient.connect(URL, onConnected);

function onConnected(err, db)
{
  if(!err)
  {
    console.log("Connected to MongoDB!");
    insertCast(db, closeConnection);
  }
  else
  {
    console.log("Problems connecting to the DB: " + err);
  }
}

function insertCast(db, callback)
{
  var cast = db.collection("cast");
  cast.insertMany([ted, carson, kyan, thom, jai], onInsertManyComplete);
  callback(null, db);
}

function onInsertManyComplete(err, result)
{
  if(!err)
  {
    console.log("Inserted " + result.result.n + " documents into the document collection");
    console.dir(result);
  }
  else
  {
    console.log("Problems inserting records: " + err);
  }
}

function closeConnection(err, db)
{
  console.log("Closing connection");
  db.close();
}

We run the program by entering node create.js and it outputs the following:

Connected to MongoDB!
Closing connection
Inserted 5 documents into the document collection
{ result: { ok: 1, n: 5 },
  ops: 
   [ { name: 'Ted Allen',
       description: 'Food and Wine Connoisseur',
       specialties: [Object],
       age: 52,
       contactInfo: [Object],
       _id: [Object] },
     { name: 'Carson Kressley',
       description: 'Fashion Savant',
       specialties: [Object],
       age: 47,
       contactInfo: [Object],
       _id: [Object] },
     { name: 'Kyan Douglas',
       description: 'Grooming Guru',
       specialties: [Object],
       age: 47,
       contactInfo: [Object],
       _id: [Object] },
     { name: 'Thom Filicia',
       description: 'Design Doctor',
       specialties: [Object],
       age: 48,
       contactInfo: [Object],
       _id: [Object] },
     { name: 'Jai Rodriguez',
       description: 'Culture Vulture',
       specialties: [Object],
       age: 38,
       contactInfo: [Object],
       _id: [Object] } ],
  insertedCount: 5,
  insertedIds: 
   [ ObjectID { _bsontype: 'ObjectID', id: [Object] },
     ObjectID { _bsontype: 'ObjectID', id: [Object] },
     ObjectID { _bsontype: 'ObjectID', id: [Object] },
     ObjectID { _bsontype: 'ObjectID', id: [Object] },
     ObjectID { _bsontype: 'ObjectID', id: [Object] } ] }


Retrieve

Now let's retrieve the records. Create a new file called retrieve.js and add the following:

 1
 2
 3
 4
 5
 6
 7
 8
 9
10
11
12
13
14
15
16
17
18
19
20
21
22
23
24
25
26
27
28
29
30
31
32
33
34
35
36
37
38
39
40
41
42
43
44
45
46
47
48
49
50
51
52
53
54
55
56
57
58
59
60
/**
 * retrieve.js
 *
 * By: Mike Klepper
 * Date: 3 September 2017
 *
 * This program retrieves all records in the cast collection
 *
 * See blog post on patriot-geek.blogspot.com
 * for instructions.
 */

var MongoClient = require("mongodb").MongoClient;

const DATABASE_NAME = "qeftsg";
const URL = "mongodb://localhost:27017/" + DATABASE_NAME;

var database = null;
MongoClient.connect(URL, onConnected);

function onConnected(err, db)
{
  if(!err)
  {
    console.log("Connected to MongoDB!");
    database = db;
    findEverybody(db, closeConnection);
  }
  else
  {
    console.log("Problems connecting to the DB: " + err);
  }
}

function findEverybody(db, closeConnection)
{
  var cast = db.collection("cast");
  cast.find({}, {name: 1, age: 1, _id: 0}).toArray(onResultsFound);
}

function onResultsFound(err, docs)
{
  if(!err)
  {
    console.log("Found the following docs:");
    console.dir(docs);
  }
  else
  {
    console.log("Problems retrieving documents: " + err);
  }

  closeConnection(null, database);
}

function closeConnection(err, db)
{
  console.log("Closing connection");
  database.close();
}

Run the program with node retrieve.js and the output is as expected:

Connected to MongoDB!
Found the following records
[ { name: 'Ted Allen', age: 52 },
  { name: 'Carson Kressley', age: 47 },
  { name: 'Kyan Douglas', age: 47 },
  { name: 'Thom Filicia', age: 48 },
  { name: 'Jai Rodriguez', age: 38 } ]
Closing connection


Update

To demonstrate how to update a record, we will update Ted's age. Create a file called update.js and add the following to it:

 1
 2
 3
 4
 5
 6
 7
 8
 9
10
11
12
13
14
15
16
17
18
19
20
21
22
23
24
25
26
27
28
29
30
31
32
33
34
35
36
37
38
39
40
41
42
43
44
45
46
47
48
49
50
51
52
53
54
55
56
57
58
59
60
/**
 * update.js
 *
 * By: Mike Klepper
 * Date: 3 September 2017
 *
 * This program update a record in the cast collection
 *
 * See blog post on patriot-geek.blogspot.com
 * for instructions.
 */

var MongoClient = require("mongodb").MongoClient;

const DATABASE_NAME = "qeftsg";
const URL = "mongodb://localhost:27017/" + DATABASE_NAME;

var database = null;
MongoClient.connect(URL, onConnected);

function onConnected(err, db)
{
  if(!err)
  {
    console.log("Connected to MongoDB!");
    database = db;
    updateTed(db, closeConnection);
  }
  else
  {
    console.log("Problems connecting to the DB: " + err);
  }
}

function updateTed(db, callback)
{
  var cast = db.collection("cast");
  cast.updateOne({name: "Ted Allen"}, {$set: {age: 53}}, onUpdate);
}

function onUpdate(err, result)
{
  if(!err)
  {
    console.log("Updated Ted");
    console.log(JSON.stringify(result, null, 5));
  }
  else
  {
    console.log("Problems updating the DB: " + err);
  }

  closeConnection(null, database);
}

function closeConnection(err, db)
{
  console.log("Closing connection");
  database.close();
}

Run the program with node update.js and the output is:

Connected to MongoDB!
Updated Ted
{
     "n": 1,
     "nModified": 1,
     "ok": 1
}
Closing connection

Then rerun retrieve.js and we see that Ted's age has indeed been set to 53:

Connected to MongoDB!
Found the following records
[ { name: 'Ted Allen', age: 53 },
  { name: 'Carson Kressley', age: 47 },
  { name: 'Kyan Douglas', age: 47 },
  { name: 'Thom Filicia', age: 48 },
  { name: 'Jai Rodriguez', age: 38 } ]
Closing connection


Delete

Finally, let's delete Jai from the database. Create delete.js and add the following lines:

 1
 2
 3
 4
 5
 6
 7
 8
 9
10
11
12
13
14
15
16
17
18
19
20
21
22
23
24
25
26
27
28
29
30
31
32
33
34
35
36
37
38
39
40
41
42
43
44
45
46
47
48
49
50
51
52
53
54
55
56
57
58
59
60
/**
 * delete.js
 *
 * By: Mike Klepper
 * Date: 3 September 2017
 *
 * This program deletes a record from the cast collection
 *
 * See blog post on patriot-geek.blogspot.com
 * for instructions.
 */

var MongoClient = require("mongodb").MongoClient;

const DATABASE_NAME = "qeftsg";
const URL = "mongodb://localhost:27017/" + DATABASE_NAME;

var database = null;
MongoClient.connect(URL, onConnected);

function onConnected(err, db)
{
  if(!err)
  {
    console.log("Connected to MongoDB!");
    database = db;
    deleteJai(db, closeConnection);
  }
  else
  {
    console.log("Problems connecting to the DB: " + err);
  }
}

function deleteJai(db, callback)
{
  var cast = db.collection("cast");
  cast.deleteOne({name: "Jai Rodriguez"}, onDeleted);
}

function onDeleted(err, result)
{
  if(!err)
  {
    console.log("Deleted Jai");
    console.log(JSON.stringify(result, null, 5));
  }
  else
  {
    console.log("Problems deleting document: " + err);
  }

  closeConnection(err, database);
}

function closeConnection(err, db)
{
  console.log("Closing connection");
  database.close();
}

Run it, and the output should be:

Connected to MongoDB!
Deleted Jai
{
     "n": 1,
     "ok": 1
}
Closing connection


Conclusion

That's the basics of using Native Mongo Driver. There is much more to the Native Mongo Client, including:

  • Batch operations
  • Cursor management
  • Aggregation pipeline
  • Application performance management

A great source for information and tutorials is the official documentation.